Western Digital My Passport Damage
We are sent lots of devices that have been taken to a local computer repair shop for data recovery first. In recent years we’ve seen an alarming increase in general technician damage. There is however one make of drive that is now so common to see damage on that we feel it justifies an example as a warning to others and to technicians themselves.
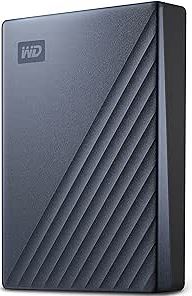
The Western Digital My Passport and My Passport Ultra are part of the Spyglass family of drives and are sold in various capacities, the most common for us to see are the 4 and 5 TB versions.
They have quickly developed a reputation as being a challenging drive to recover, suffering from numerous physical and firmware issues. It’s not uncommon for these drive to simple fail whilst in standard use for no apparent reason. When this happens people take the drive to their local computer repair shop especially if they claim to offer data recovery service.
Initial Damage
Not having the experience or tools to accurately assess the state of a failing hard drive it is common for a computer technician to try and open the external plastic casing of the drives. Usually this is done under the incorrect assumption they can remove the USB adapter and connect the drive directly to a SATA port or an external drive dock to try retail data recovery software applications. All of these drives are USB only.
This is the first place damage occurs, the drives can be held in place by plastic clips that need removing, inexperience technicians are trying to lever the drives out with screwdrivers or plastic spudger prying against the drive body, without removing the clips.
The Printed Circuit Board (PCB) on these types of drives is extremely thin and fragile. It measures just 0.3mm in thickness whereas previous generations of PCB were twice this at 0.6mm. Any pressure against the PCB itself will either chip or break it, leaving the drive inoperable.
Never use a tool to lever against the drive body.
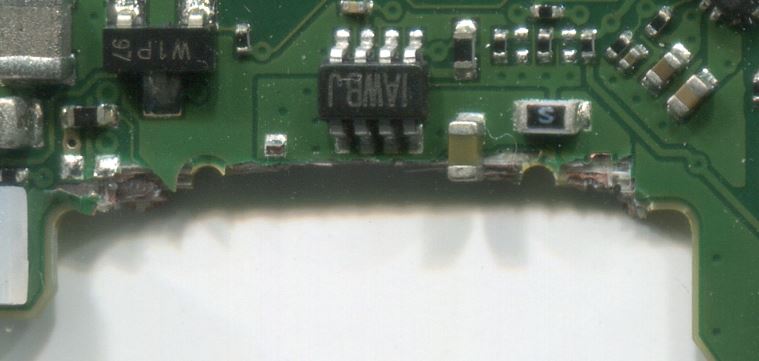
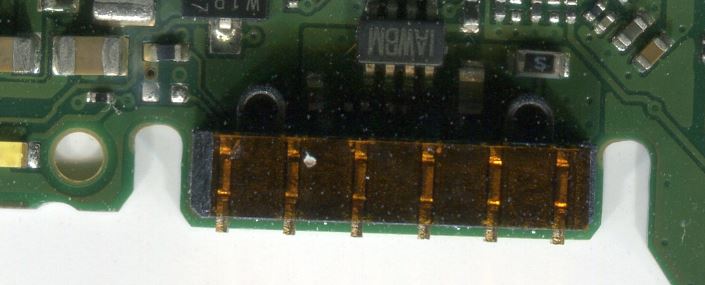
This case had a large section of the PCB snapped off along with key power components, the second image shows an undamaged pcb.
Secondary Damage
Having removed the drive from the casing and damaging the PCB, when powered the drive will either appear completely dead and wont spin or produce a “hard” repetitive clicking and potentially spin down. Unaware that this is due to the damage they have just done technicians often try to remove the PCB.
Removing the 5 screws and pulling up on the PCB from the taller side will snap or crack the PCB in a straight line towards the ASMedia USB controller chip.
Never pull these PCBs up from taller side.
The PCB will be stuck to the drive body via the thermal pad on top of the MCU. It will also be held securely via the white plastic HSA connector next to it.
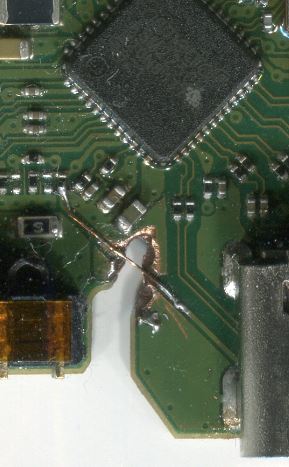
In this case the technician had tried to grind out the damage and remake the visible track with jumper wire.
Making things worse trying to fix them
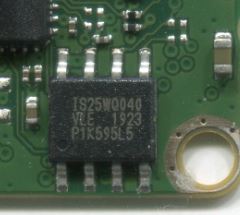
Presented now with a snapped, very obvious none functioning PCB technicians often turn to Ebay or Aliexpress to buy a replacement board cheaply. You can not just swap a PCB on a modern hard drive. Modern drives have hardware specific attributes written into a ROM on the PCB. Either this chip needs to be moved to the new PCB or the data from it transferred. If this ROM is lost or damaged your data can not be recovered
If after all of this the drive is somehow powering on and is recognised, it’s likely now that no data can be seen. Most of these drives are Self Encrypting Drives (SED). The unique key that unscrambles your data is not stored in the ROM like other drive specific information, it is stored in the MCU, the large chip under the red thermal pad. To access your data the MCU must also be moved to the new pcb.
This requires removing the donor MCU and the original MCU, reballing the chip and then re-soldering the original MCU to the donor PCB. This must be done without overheating the chip, melting the plastic HSA connector next to it, allowing the very thin PCB to warp with the heat or disturbing any of the other components.
If the MCU is damaged or lost your data can not be recovered.
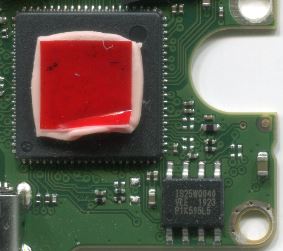
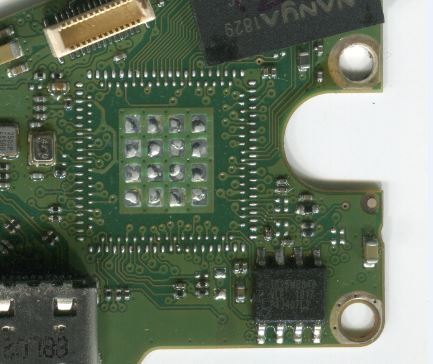
The above cases used as examples are real drives that we received after prior recovery attempts at computer stores where they had been classed as unrecoverable and returned to the clients.
Both cases required extensive work replacing the damaged PCB’s and migrating the ROM and MCU and converting the PCBs to SATA before a full evaluation of the drives could be undertaken. In both cases the actual original fault was found to be bad sectors on the drive unrelated to the technician damage.
We were able to recover 100% of the clients data for them as should most data recovery companies, this however was at the increased cost of a Tier 3 recovery, SED surcharge, additional capacity surcharge and donor parts, instead of the Tier 1 basic logical recovery that was needed before the technician damage. These clients were lucky and suffered only a financial loss rather than total data loss.
The Correct Recovery Procedure
Before any technician damage
If we receive this drives before they have been worked on we can normally recover those without head damage within our Tier 1 or Tier 2 recovery plans. We follow a standard procedure when working on Spyglass drives.
- Convert the PCB from USB to SATA.
- Remove the security lock from the drive ROM.
- Make a backup of all modules, the ROM and the service tracks.
- Stabilise the drive firmware to prevent any further damage.
- Image the drive data onto stable and secure media on one of our servers.
- Recover any required user files for the client from the image.
After technician damage
We can fix most of the damage caused by technicians, we prefer to work on the original PCB and can often repair the snapped tracks and replace missing components without the need to swap the PCB. If there is too much damage to repair then we can move the ROM and MCU correctly and safely to a donor PCB as long as they are original to the drive and have not been otherwise damaged. This due to the complex and technical nature, time required microsoldering and donor drives is always done at our Tier 3 plan, which can represent a significant increase in cost. We can not recover your data if the ROM or MCU is damaged or lost.
A plea to technicians and repair shops
Please stop trying to recover these drives.
Even if the above mistakes don’t apply to you personally, it doesn’t matter how technically skilled you are or what file recovery software you have. These drives are locked down by Western Digital and without professional data recovery tools like PC3000 you can not work on them without risking damage to the drive and data, either physically or to the second level translator.
It’s often more cost effective just to pass these drives on to your data recovery partner than to put your clients data at risk attempting an in house recovery. If you don’t have a recovery partner contact us and we’ll be happy to help.